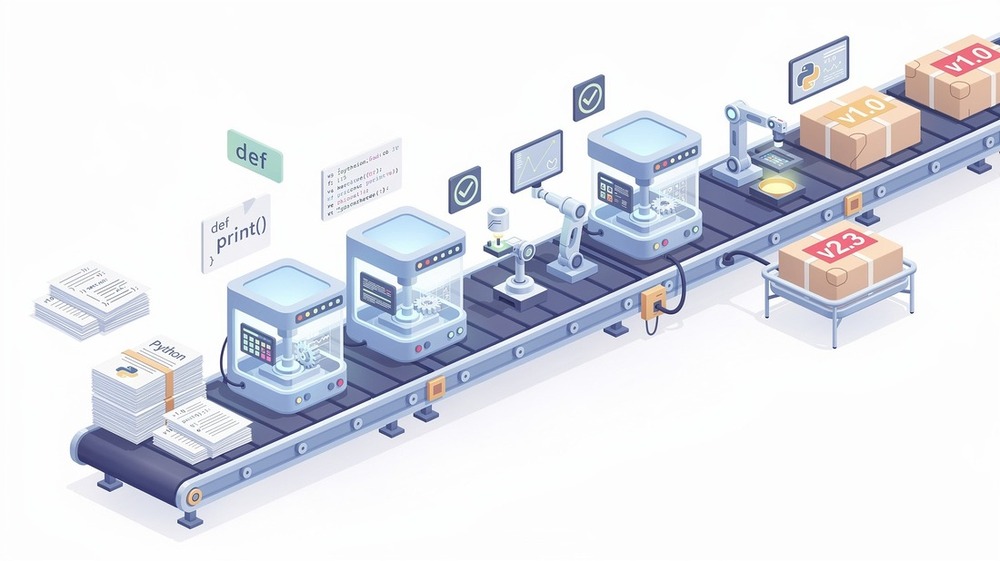
Publishing your own Python package to PyPI might sound intimidating, but it's actually straightforward once you understand the process. In this tutorial, we'll build a real utility library from scratch and publish it so anyone can install it with pip install your-package. By the end, you'll have a published package and the knowledge to do it again for any project.
Why Create Your Own Python Library?
There are several good reasons to package your code:
- Reusability: Install your utilities across multiple projects with a single command
- Sharing: Let other developers use your code without copy-pasting files
- Portfolio: Published packages demonstrate real-world Python skills
- Learning: Understanding packaging deepens your knowledge of how Python works
We'll build a string utilities library with functions you might actually use: slugifying text for URLs, truncating strings, and proper title case conversion. Nothing too complex, but genuinely useful.
Prerequisites
Before we start, make sure you have:
- Python 3.8 or higher installed (check with
python --version) - Basic Python knowledge (functions, classes, importing modules)
- A PyPI account — register at pypi.org
- A TestPyPI account — register at test.pypi.org
TestPyPI is a separate instance of PyPI meant for testing. We'll publish there first to make sure everything works before going to production.
Project Structure
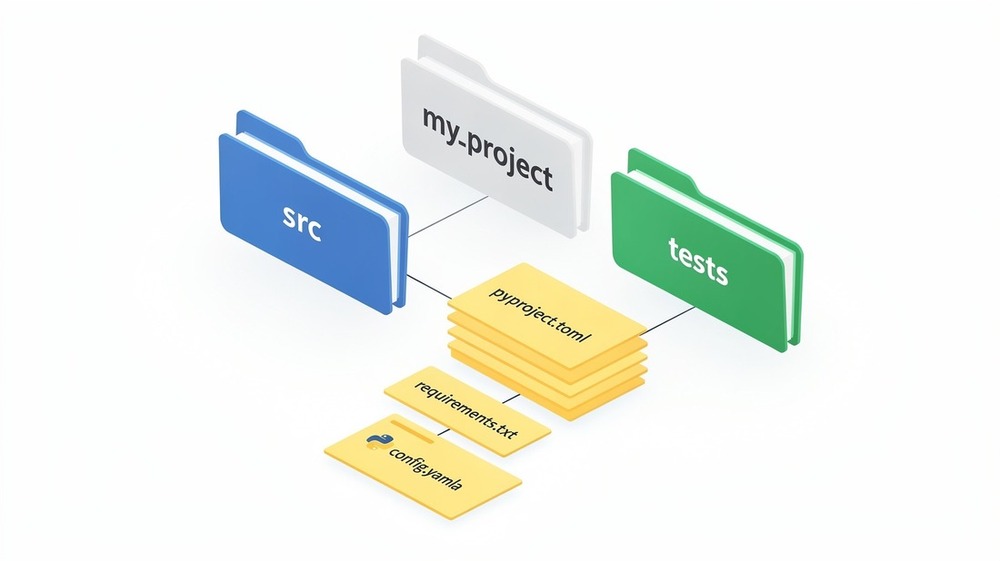
Let's create a proper project structure. We'll use the src layout, which is the modern recommended approach. It prevents accidentally importing your local code instead of the installed package during testing.
mkdir my-string-utils
cd my-string-utils
mkdir -p src/my_string_utils tests
touch src/my_string_utils/__init__.py
touch src/my_string_utils/transforms.py
touch tests/__init__.py
touch tests/test_transforms.py
touch pyproject.toml README.md LICENSE
Your directory should look like this:
my-string-utils/
├── src/
│   └── my_string_utils/
│       ├── __init__.py
│       └── transforms.py
├── tests/
│   ├── __init__.py
│   └── test_transforms.py
├── pyproject.toml
├── README.md
└── LICENSE
A few notes on naming:
- The project directory (
my-string-utils) can use hyphens - The package directory (
my_string_utils) must use underscores (Python import rules) - The PyPI name will be
my-string-utils(what users type inpip install) - The import name will be
my_string_utils(what users type inimport)
Initialize a git repository while you're at it:
git init
echo "__pycache__/" >> .gitignore
echo "dist/" >> .gitignore
echo "*.egg-info/" >> .gitignore
echo ".venv/" >> .gitignore
Writing Your Library Code
Let's write actual useful code. Open src/my_string_utils/transforms.py:
"""String transformation utilities."""

import re
import unicodedata
from typing import Optional


def slugify(text: str, separator: str = "-", lowercase: bool = True) -> str:
    """
    Convert a string to a URL-friendly slug.

    Args:
        text: The string to slugify.
        separator: Character to use between words (default: hyphen).
        lowercase: Whether to convert to lowercase (default: True).

    Returns:
        A URL-safe slug string.

    Examples:
        >>> slugify("Hello World!")
        'hello-world'
        >>> slugify("Crème Brûlée")
        'creme-brulee'
        >>> slugify("Python 3.12 Released", separator="_")
        'python_3_12_released'
    """
    # Normalize unicode characters (é -> e, ü -> u, etc.)
    text = unicodedata.normalize("NFKD", text)
    text = text.encode("ascii", "ignore").decode("ascii")

    # Convert to lowercase if requested
    if lowercase:
        text = text.lower()

    # Replace any non-alphanumeric characters with the separator
    text = re.sub(r"[^a-zA-Z0-9]+", separator, text)

    # Remove leading/trailing separators and collapse multiple separators
    text = text.strip(separator)
    text = re.sub(f"{re.escape(separator)}+", separator, text)

    return text


def truncate(
    text: str,
    max_length: int,
    suffix: str = "...",
    word_boundary: bool = True
) -> str:
    """
    Truncate a string to a maximum length with a suffix.

    Args:
        text: The string to truncate.
        max_length: Maximum length of the result (including suffix).
        suffix: String to append when truncating (default: "...").
        word_boundary: If True, truncate at word boundaries (default: True).

    Returns:
        The truncated string, or the original if shorter than max_length.

    Examples:
        >>> truncate("Hello World", 8)
        'Hello...'
        >>> truncate("Hello World", 8, word_boundary=False)
        'Hello...'
        >>> truncate("Short", 10)
        'Short'
    """
    if len(text) <= max_length:
        return text

    # Calculate available space for text
    available = max_length - len(suffix)

    if available <= 0:
        return suffix[:max_length]

    truncated = text[:available]

    if word_boundary:
        # Find the last space within the truncated portion
        last_space = truncated.rfind(" ")
        if last_space > 0:
            truncated = truncated[:last_space]

    return truncated.rstrip() + suffix


def to_title_case(text: str, exceptions: Optional[list[str]] = None) -> str:
    """
    Convert a string to title case with proper handling of small words.

    Unlike Python's built-in str.title(), this function keeps small words
    (articles, prepositions, conjunctions) in lowercase unless they're
    the first or last word.

    Args:
        text: The string to convert.
        exceptions: Words to keep lowercase (uses default list if None).

    Returns:
        The string in title case.

    Examples:
        >>> to_title_case("the quick brown fox")
        'The Quick Brown Fox'
        >>> to_title_case("war and peace")
        'War and Peace'
        >>> to_title_case("the lord of the rings")
        'The Lord of the Rings'
    """
    if exceptions is None:
        exceptions = [
            "a", "an", "the",           # articles
            "and", "but", "or", "nor",  # conjunctions
            "as", "at", "by", "for",    # prepositions
            "in", "of", "on", "to",
            "up", "yet", "so"
        ]

    words = text.split()
    if not words:
        return text

    result = []
    for i, word in enumerate(words):
        # First and last words are always capitalized
        if i == 0 or i == len(words) - 1:
            result.append(word.capitalize())
        elif word.lower() in exceptions:
            result.append(word.lower())
        else:
            result.append(word.capitalize())

    return " ".join(result)


def reverse_words(text: str) -> str:
    """
    Reverse the order of words in a string.

    Args:
        text: The string to reverse.

    Returns:
        The string with words in reverse order.

    Examples:
        >>> reverse_words("Hello World")
        'World Hello'
        >>> reverse_words("one two three")
        'three two one'
    """
    return " ".join(text.split()[::-1])
Now let's set up the package's __init__.py to expose these functions. Open src/my_string_utils/__init__.py:
"""
my_string_utils - A collection of string transformation utilities.

This package provides simple, useful functions for common string operations
like slugifying, truncating, and title case conversion.
"""

from my_string_utils.transforms import (
    slugify,
    to_title_case,
    truncate,
    reverse_words,
)

__version__ = "0.1.0"
__author__ = "Your Name"
__email__ = "your.email@example.com"

__all__ = [
    "slugify",
    "to_title_case",
    "truncate",
    "reverse_words",
    "__version__",
]
The __all__ list explicitly declares what gets exported when someone does from my_string_utils import *. It's good practice to define this even if you discourage wildcard imports.
Configuring pyproject.toml
The pyproject.toml file is where all your package metadata lives. It replaced the old setup.py approach and is now the standard way to configure Python packages.
Create your pyproject.toml:
[build-system]
requires = ["hatchling"]
build-backend = "hatchling.build"

[project]
name = "my-string-utils"
version = "0.1.0"
description = "A collection of string transformation utilities for Python"
readme = "README.md"
license = {text = "MIT"}
requires-python = ">=3.8"
authors = [
    {name = "Your Name", email = "your.email@example.com"}
]
keywords = [
    "string",
    "utilities",
    "slugify",
    "text",
    "transformation"
]
classifiers = [
    "Development Status :: 4 - Beta",
    "Intended Audience :: Developers",
    "License :: OSI Approved :: MIT License",
    "Operating System :: OS Independent",
    "Programming Language :: Python :: 3",
    "Programming Language :: Python :: 3.8",
    "Programming Language :: Python :: 3.9",
    "Programming Language :: Python :: 3.10",
    "Programming Language :: Python :: 3.11",
    "Programming Language :: Python :: 3.12",
    "Topic :: Text Processing",
    "Typing :: Typed",
]

[project.urls]
Homepage = "https://github.com/yourusername/my-string-utils"
Repository = "https://github.com/yourusername/my-string-utils"
Documentation = "https://github.com/yourusername/my-string-utils#readme"
Issues = "https://github.com/yourusername/my-string-utils/issues"

[project.optional-dependencies]
dev = [
    "pytest>=7.0",
    "pytest-cov>=4.0",
]
Let's break down the important parts:
- build-system: We're using
hatchling, a modern build backend. Alternatives includesetuptoolsandflit. - project.name: The name on PyPI (with hyphens)
- project.version: Start at 0.1.0 for initial development
- requires-python: Minimum Python version
- classifiers: Standardized labels that help users find your package on PyPI
- project.optional-dependencies: Extra packages for development that aren't required to use your library
Adding a License
Every published package should have a license. The MIT license is popular for open source because it's permissive and simple. Create LICENSE:
MIT License

Copyright (c) 2026 Your Name

Permission is hereby granted, free of charge, to any person obtaining a copy
of this software and associated documentation files (the "Software"), to deal
in the Software without restriction, including without limitation the rights
to use, copy, modify, merge, publish, distribute, sublicense, and/or sell
copies of the Software, and to permit persons to whom the Software is
furnished to do so, subject to the following conditions:

The above copyright notice and this permission notice shall be included in all
copies or substantial portions of the Software.

THE SOFTWARE IS PROVIDED "AS IS", WITHOUT WARRANTY OF ANY KIND, EXPRESS OR
IMPLIED, INCLUDING BUT NOT LIMITED TO THE WARRANTIES OF MERCHANTABILITY,
FITNESS FOR A PARTICULAR PURPOSE AND NONINFRINGEMENT. IN NO EVENT SHALL THE
AUTHORS OR COPYRIGHT HOLDERS BE LIABLE FOR ANY CLAIM, DAMAGES OR OTHER
LIABILITY, WHETHER IN AN ACTION OF CONTRACT, TORT OR OTHERWISE, ARISING FROM,
OUT OF OR IN CONNECTION WITH THE SOFTWARE OR THE USE OR OTHER DEALINGS IN THE
SOFTWARE.
Writing Tests
Testing your code before publishing is essential. Let's write some tests using pytest. Open tests/test_transforms.py:
"""Tests for string transformation functions."""

import pytest
from my_string_utils import slugify, truncate, to_title_case, reverse_words


class TestSlugify:
    """Tests for the slugify function."""

    def test_basic_slugify(self):
        assert slugify("Hello World") == "hello-world"

    def test_special_characters(self):
        assert slugify("Hello, World!") == "hello-world"
        assert slugify("What's up?") == "whats-up"

    def test_unicode_characters(self):
        assert slugify("Crème Brûlée") == "creme-brulee"
        assert slugify("München") == "munchen"

    def test_custom_separator(self):
        assert slugify("Hello World", separator="_") == "hello_world"
        assert slugify("Hello World", separator=".") == "hello.world"

    def test_preserve_case(self):
        assert slugify("Hello World", lowercase=False) == "Hello-World"

    def test_multiple_spaces(self):
        assert slugify("Hello    World") == "hello-world"

    def test_leading_trailing_special_chars(self):
        assert slugify("---Hello World---") == "hello-world"


class TestTruncate:
    """Tests for the truncate function."""

    def test_no_truncation_needed(self):
        assert truncate("Hello", 10) == "Hello"
        assert truncate("Hello", 5) == "Hello"

    def test_basic_truncation(self):
        assert truncate("Hello World", 8) == "Hello..."

    def test_truncation_no_word_boundary(self):
        result = truncate("Hello World", 8, word_boundary=False)
        assert result == "Hello..."
        assert len(result) <= 8

    def test_custom_suffix(self):
        assert truncate("Hello World", 9, suffix="…") == "Hello W…"

    def test_very_short_max_length(self):
        assert truncate("Hello", 3) == "..."
        assert truncate("Hello", 2) == ".."


class TestToTitleCase:
    """Tests for the to_title_case function."""

    def test_basic_title_case(self):
        assert to_title_case("hello world") == "Hello World"

    def test_articles_lowercase(self):
        assert to_title_case("the quick brown fox") == "The Quick Brown Fox"
        assert to_title_case("a tale of two cities") == "A Tale of Two Cities"

    def test_conjunctions_lowercase(self):
        assert to_title_case("war and peace") == "War and Peace"

    def test_first_last_always_capitalized(self):
        assert to_title_case("the lord of the rings") == "The Lord of the Rings"
        assert to_title_case("of mice and men") == "Of Mice and Men"

    def test_custom_exceptions(self):
        result = to_title_case("python is great", exceptions=["is"])
        assert result == "Python is Great"

    def test_empty_string(self):
        assert to_title_case("") == ""


class TestReverseWords:
    """Tests for the reverse_words function."""

    def test_basic_reverse(self):
        assert reverse_words("Hello World") == "World Hello"

    def test_multiple_words(self):
        assert reverse_words("one two three") == "three two one"

    def test_single_word(self):
        assert reverse_words("Hello") == "Hello"

    def test_empty_string(self):
        assert reverse_words("") == ""
Install your package in development mode and run the tests:
# Create a virtual environment (recommended)
python -m venv .venv
source .venv/bin/activate  # On Windows: .venv\Scripts\activate

# Install your package in editable mode with dev dependencies
pip install -e ".[dev]"

# Run tests
pytest tests/ -v
The -e flag installs your package in "editable" mode, meaning changes to your source code are immediately reflected without reinstalling.
You should see output like:
========================= test session starts ==========================
collected 20 items

tests/test_transforms.py::TestSlugify::test_basic_slugify PASSED
tests/test_transforms.py::TestSlugify::test_special_characters PASSED
...
========================= 20 passed in 0.12s ===========================
Creating Your README
A good README is essential. It's the first thing people see on PyPI and GitHub. Create README.md with the following sections:
- Title and description: What your package does
- Installation:
pip install my-string-utils - Quick Start: Show 2-3 basic usage examples
- API Reference: Document each function with its parameters and return values
- Requirements: Python version and any dependencies
- License: MIT or your chosen license
Keep your README concise but informative. Include practical examples that users can copy and run immediately. The docstrings you wrote earlier can serve as the basis for your API documentation.
Building Your Package
Now let's build the distribution files. First, install the build tool:
pip install build
Then build your package:
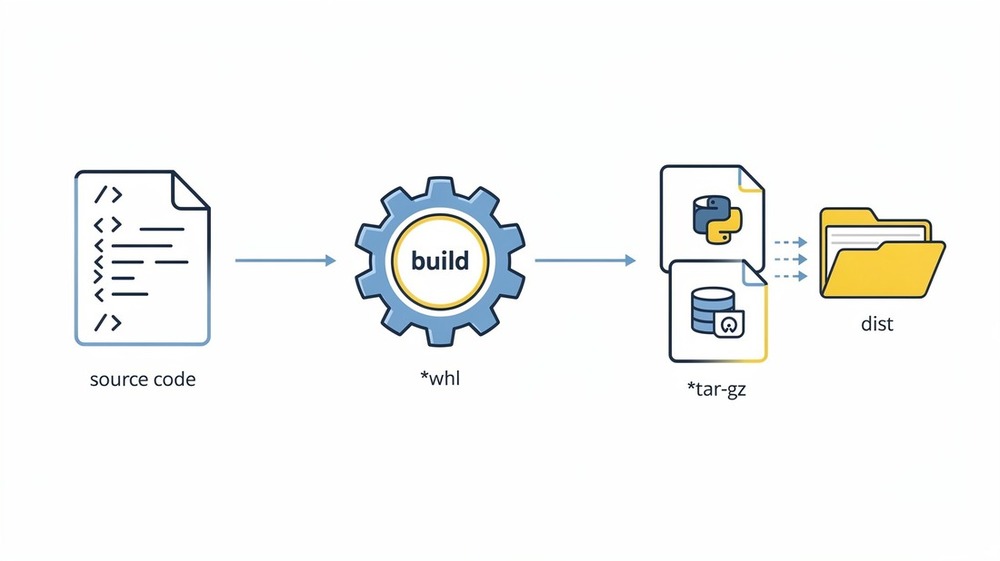
python -m build
This creates a dist/ directory containing two files:
dist/
├── my_string_utils-0.1.0-py3-none-any.whl
└── my_string_utils-0.1.0.tar.gz
.whl(wheel): A pre-built binary package that installs quickly.tar.gz(sdist): Source distribution containing your raw source code
Both are uploaded to PyPI, but users typically install the wheel.
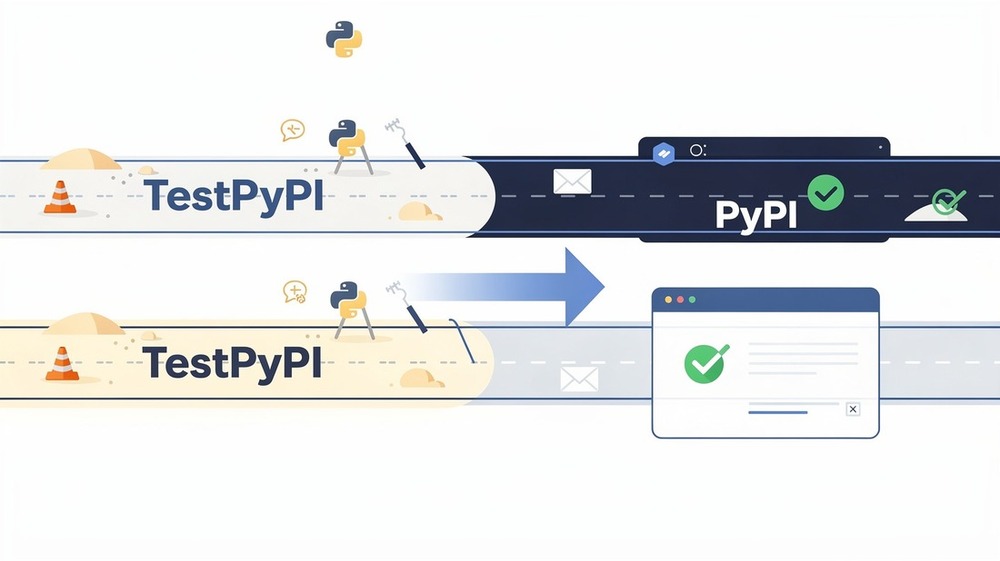
Publishing to TestPyPI
Before publishing to the real PyPI, let's test on TestPyPI. This lets you verify everything works without polluting the real package index.
First, install twine:
pip install twine
Create an API token on TestPyPI:
- Log into test.pypi.org
- Go to Account Settings → API tokens
- Click "Add API token"
- Name it (e.g., "my-string-utils upload")
- Set scope to "Entire account" (or specific project after first upload)
- Copy the token — it starts with
pypi-
Now upload to TestPyPI:
twine upload --repository testpypi dist/*
When prompted:
- Username:
__token__ - Password: Your API token (the full string starting with
pypi-)
You should see:
Uploading my_string_utils-0.1.0-py3-none-any.whl
Uploading my_string_utils-0.1.0.tar.gz
View at: https://test.pypi.org/project/my-string-utils/0.1.0/
Test the installation from TestPyPI:
# Create a fresh virtual environment to test
python -m venv test-install
source test-install/bin/activate

# Install from TestPyPI
pip install --index-url https://test.pypi.org/simple/ my-string-utils

# Test it works
python -c "from my_string_utils import slugify; print(slugify('It Works!'))"
If you see it-works, your package is working correctly.
Publishing to PyPI
Once you've verified everything works on TestPyPI, publishing to the real PyPI is almost identical.
Create an API token on PyPI:
- Log into pypi.org
- Go to Account Settings → API tokens
- Create a token the same way as TestPyPI
- Save it securely — you'll need it for future uploads
Upload to PyPI:
twine upload dist/*
Enter __token__ as username and your PyPI API token as the password.
Your package is now live. Anyone can install it:
pip install my-string-utils
Storing Credentials Securely
Typing your API token every time gets old. Create a ~/.pypirc file:
[pypi]
username = __token__
password = pypi-your-actual-token-here

[testpypi]
username = __token__
password = pypi-your-testpypi-token-here
Set restrictive permissions:
chmod 600 ~/.pypirc
Now twine upload will use these credentials automatically.
Common Mistakes and Pitfalls

Package Name Already Taken
PyPI names are first-come-first-served. If my-string-utils is taken, you'll need a different name. Check availability at pypi.org before building.
Fix: Choose a unique name, perhaps prefixed with your username: yourname-string-utils.
Forgetting __init__.py
Without __init__.py, Python won't recognize your directory as a package.
# Wrong - missing __init__.py
src/my_string_utils/
    transforms.py

# Correct
src/my_string_utils/
    __init__.py
    transforms.py
Version Number Conflicts
PyPI doesn't allow re-uploading the same version. If you upload 0.1.0, you can't upload a "fixed" 0.1.0.
Fix: Always bump the version for any change. Use 0.1.1, 0.1.2, etc.
Missing Package Data
If your package includes non-Python files (JSON, templates, etc.), they might not be included by default.
For hatchling, add to pyproject.toml:
[tool.hatch.build.targets.wheel]
packages = ["src/my_string_utils"]

[tool.hatch.build.targets.sdist]
include = [
    "/src",
    "/tests",
]
Not Testing Before Publishing
Always test your package in a fresh virtual environment before publishing. The "it works on my machine" problem is real.
# Create isolated test environment
python -m venv fresh-test
source fresh-test/bin/activate
pip install dist/my_string_utils-0.1.0-py3-none-any.whl
python -c "from my_string_utils import slugify; print(slugify('test'))"
Best Practices
Use Semantic Versioning
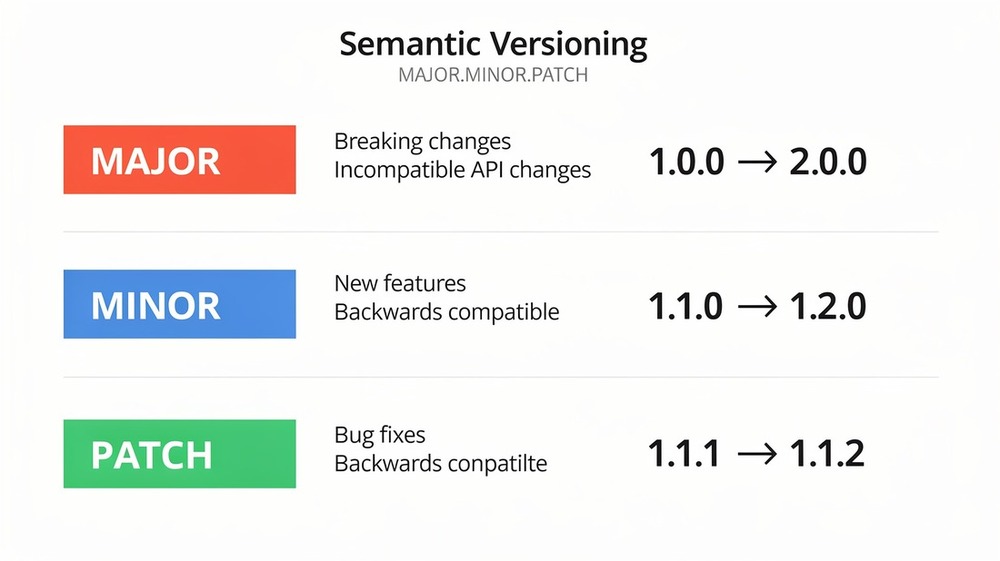
Follow semver.org conventions:
- MAJOR.MINOR.PATCH (e.g., 1.2.3)
- PATCH (1.2.3 → 1.2.4): Bug fixes, no API changes
- MINOR (1.2.3 → 1.3.0): New features, backwards compatible
- MAJOR (1.2.3 → 2.0.0): Breaking changes
Keep versions below 1.0.0 during early development to signal the API isn't stable yet.
Single Source of Version Truth
Keep the version in one place to avoid mismatches. With hatchling, you can read it from your code:
[project]
dynamic = ["version"]

[tool.hatch.version]
path = "src/my_string_utils/__init__.py"
Add Type Hints
Type hints improve developer experience with autocomplete and error checking:
def slugify(text: str, separator: str = "-") -> str:
    ...
Create src/my_string_utils/py.typed (an empty file) to mark your package as typed.
Automate Publishing with GitHub Actions
Create .github/workflows/publish.yml:
name: Publish to PyPI

on:
  release:
    types: [published]

jobs:
  publish:
    runs-on: ubuntu-latest
    steps:
      - uses: actions/checkout@v4

      - name: Set up Python
        uses: actions/setup-python@v5
        with:
          python-version: "3.12"

      - name: Install dependencies
        run: |
          python -m pip install --upgrade pip
          pip install build twine

      - name: Build package
        run: python -m build

      - name: Publish to PyPI
        env:
          TWINE_USERNAME: __token__
          TWINE_PASSWORD: ${{ secrets.PYPI_API_TOKEN }}
        run: twine upload dist/*
Add your PyPI token as a GitHub secret named PYPI_API_TOKEN. Now publishing happens automatically when you create a GitHub release.
Add Badges to Your README
Badges give users quick info about your package:
[](https://pypi.org/project/my-string-utils/)
[](https://pypi.org/project/my-string-utils/)
[](https://opensource.org/licenses/MIT)
Updating Your Package
When you're ready to release a new version:
- Update the version in
__init__.py(andpyproject.tomlif not using dynamic versioning) - Update any changelog or release notes
- Clean old builds:
rm -rf dist/ - Build:
python -m build - Upload:
twine upload dist/*
Conclusion
You've just published your first Python package to PyPI. Here's what we covered:
- Setting up a proper project structure with src layout
- Writing library code with type hints and docstrings
- Configuring
pyproject.tomlwith modern tooling - Testing with pytest
- Building with
python -m build - Publishing with twine to TestPyPI and PyPI
Your package is now available for anyone to install with pip install my-string-utils. That's a real accomplishment.
For next steps, consider adding:
- Continuous integration with GitHub Actions
- More comprehensive tests with coverage reporting
- Documentation with Sphinx or MkDocs
- Pre-commit hooks for code quality
Explore more tutorials or check out the official Python Packaging User Guide to continue learning.